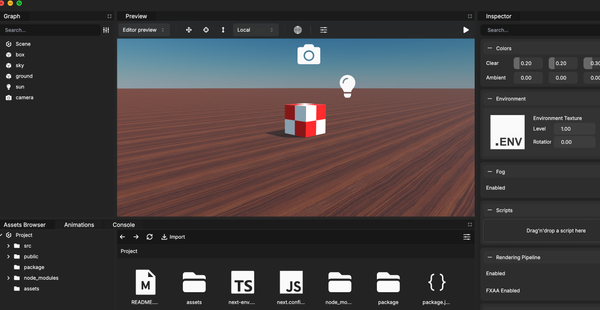
The landscape of web development is in a constant state of evolution, and nowhere is this more apparent than in the realm of 3D graphics. For years, WebGL has been the cornerstone of interactive 3D experiences on the web, powering everything from simple product viewers to complex browser-based games. However, as the demands for richer, more performant applications grow, the need for a more modern, powerful graphics API has become undeniable. Enter WebGPU, the long-awaited successor to WebGL, designed from the ground up to unlock the full potential of modern GPUs.
In a landmark development for the web graphics community, the Babylon.js team has announced full, out-of-the-box support for WebGPU. This is not just an incremental update; it’s a paradigm shift that promises to redefine what’s possible in the browser. By providing a seamless, high-level abstraction over this new, low-level API, Babylon.js is making next-generation performance and capabilities accessible to all web developers. This article provides a comprehensive technical deep dive into what this means for your projects, how to get started, and how to leverage the advanced features that WebGPU brings to the table.
The WebGPU Revolution and Its Integration with Babylon.js
To fully appreciate the significance of this update, it’s crucial to understand what WebGPU is and how it differs from its predecessor. This isn’t just a new version of WebGL; it’s a fundamental rethinking of how browsers communicate with the graphics card.
What is WebGPU and Why Does It Matter?
WebGPU is a new web standard and JavaScript API for accelerated graphics and compute, developed by the W3C “GPU for the Web” Community Group, which includes engineers from Apple, Google, Mozilla, Microsoft, and Intel. It is designed to be a more explicit, lower-level API than WebGL, drawing inspiration from modern native graphics APIs like Vulkan, Metal, and DirectX 12.
The key advantages of WebGPU over WebGL include:
- Reduced CPU Overhead: WebGPU significantly reduces the amount of work the CPU has to do to prepare commands for the GPU. This is achieved through concepts like pre-compiled Pipeline State Objects (PSOs) and command buffers, leading to much lower driver overhead and more efficient rendering.
- Better Multi-threading Support: WebGPU is designed with multi-threading in mind, allowing different parts of a frame’s rendering work to be prepared in parallel across multiple CPU cores. This is a massive improvement over WebGL’s single-threaded nature.
- Access to Compute Shaders: Perhaps the most exciting feature, WebGPU provides first-class support for compute shaders. This allows for general-purpose GPU (GPGPU) programming, enabling developers to run highly parallelized computations—like physics simulations, AI, and complex data processing—directly on the GPU.
- Predictable Performance: By being more explicit, WebGPU reduces the “magic” happening inside the graphics driver, giving developers more control and leading to more consistent and predictable performance across different hardware and platforms.
This leap forward is major Babylon.js News, but its impact will be felt across the entire ecosystem, influencing everything from Three.js News to the development of web-based game engines like Phaser News and PixiJS News.

How Babylon.js Simplifies WebGPU
While WebGPU is incredibly powerful, its low-level nature can be daunting. Writing raw WebGPU code involves managing pipelines, bind groups, and buffers explicitly, which is a significant learning curve. This is where Babylon.js shines. The framework provides a high-level, easy-to-use API that abstracts away the underlying complexity. Developers can continue to work with familiar concepts like `Scene`, `Mesh`, `Material`, and `Light`, while the engine intelligently translates these commands into optimized WebGPU (or WebGL) calls under the hood. This means you can get the benefits of WebGPU without needing to become a graphics API expert.
// Basic setup of a Babylon.js scene with WebGPU
import { Engine, WebGPUEngine } from "@babylonjs/core/Engines";
import { Scene } from "@babylonjs/core/scene";
import { Vector3 } from "@babylonjs/core/Maths/math.vector";
import { FreeCamera } from "@babylonjs/core/Cameras/freeCamera";
import { HemisphericLight } from "@babylonjs/core/Lights/hemisphericLight";
import { MeshBuilder } from "@babylonjs/core/Meshes/meshBuilder";
import "@babylonjs/core/Materials/standardMaterial";

// Get the canvas element
const canvas = document.getElementById("renderCanvas");

async function initializeScene() {
    // Check for WebGPU support
    if (!WebGPUEngine.IsSupported) {
        console.log("WebGPU is not supported on this browser.");
        return;
    }

    // Create the WebGPU engine
    const engine = new WebGPUEngine(canvas);
    await engine.initAsync();

    // Create a basic scene
    const scene = new Scene(engine);

    // Create a camera
    const camera = new FreeCamera("camera1", new Vector3(0, 5, -10), scene);
    camera.setTarget(Vector3.Zero());
    camera.attachControl(canvas, true);

    // Create a light
    const light = new HemisphericLight("light1", new Vector3(0, 1, 0), scene);
    light.intensity = 0.7;

    // Create a sphere
    const sphere = MeshBuilder.CreateSphere("sphere", { diameter: 2, segments: 32 }, scene);
    sphere.position.y = 1;

    // Create a ground plane
    const ground = MeshBuilder.CreateGround("ground", { width: 6, height: 6 }, scene);

    // Start the render loop
    engine.runRenderLoop(() => {
        scene.render();
    });

    // Handle window resize
    window.addEventListener("resize", () => {
        engine.resize();
    });
}

initializeScene();
Getting Started: Implementing WebGPU in Your Project
Transitioning your Babylon.js project to WebGPU is remarkably straightforward. The framework is designed for progressive enhancement, allowing you to adopt the new technology while maintaining compatibility with older browsers.
Enabling the WebGPU Engine
The core of enabling WebGPU is in how you instantiate the Babylon.js `Engine`. Instead of the synchronous `new Engine(…)` constructor used for WebGL, WebGPU requires an asynchronous initialization process. This is because setting up the WebGPU device and context can take a moment. Babylon.js handles this elegantly with the `createEngineAsync` method.
This approach is crucial for modern web applications. Whether you’re building with React, Vue, or Angular, this asynchronous pattern fits perfectly into component lifecycle methods or hooks. The latest React News and Vue.js News often highlight the importance of handling async operations gracefully, and integrating Babylon.js is no exception. For developers using frameworks like Next.js or Nuxt.js, this async initialization can be handled within a client-side only component to avoid server-side rendering issues.
import { Engine } from "@babylonjs/core/Engines/engine";
import { Scene } from "@babylonjs/core/scene";

const canvas = document.getElementById("renderCanvas");

async function createMyEngine() {
    // Attempt to create a WebGPU engine
    try {
        const engine = await Engine.CreateAsync(canvas, {
            engineOptions: {
                // Request WebGPU
                adaptToDeviceRatio: true,
                powerPreference: "high-performance",
            },
            // Specify the desired engine type
            renderingEngine: "webgpu"
        });

        if (engine) {
            console.log("Successfully created WebGPU Engine!");
            return engine;
        }
    } catch (e) {
        console.error("Could not create WebGPU engine.", e);
    }

    // Fallback to WebGL if WebGPU is not available or fails
    console.log("Falling back to WebGL.");
    return new Engine(canvas, true, {
        preserveDrawingBuffer: true,
        stencil: true
    });
}

// Usage
createMyEngine().then(engine => {
    const scene = new Scene(engine);
    // ... setup your scene here ...
    engine.runRenderLoop(() => {
        scene.render();
    });
});
Best Practice: Fallback to WebGL for Broader Compatibility
While WebGPU is the future, it’s not yet universally supported across all browsers and devices. For any production application, providing a fallback to WebGL is essential to ensure all users have a functional experience. The code example above demonstrates the recommended pattern: attempt to create a WebGPU engine, and if it fails for any reason (lack of browser support, hardware issues), gracefully fall back to creating a standard WebGL engine. This robust approach ensures you deliver cutting-edge performance to those who can support it, without excluding the rest of your audience.
Unlocking Advanced Features with WebGPU
The true power of Babylon.js’s WebGPU support lies in the new capabilities it unlocks. The most significant of these is the first-class support for compute shaders.

Leveraging Compute Shaders for GPGPU
Compute shaders are programs that run on the GPU for general-purpose computation, not just for rendering triangles. This opens up a world of possibilities for offloading heavy, parallelizable tasks from the CPU to the much more powerful GPU.
Potential applications include:
- Complex Particle Systems: Simulate millions of particles for effects like fire, smoke, or water, with all position and physics updates happening on the GPU.
- Physics Simulations: Perform cloth, fluid, or rigid body simulations at a scale previously impossible in the browser.
- AI and Machine Learning: Run inference for neural networks directly on the GPU for real-time applications.
- Procedural Generation: Generate complex terrain, textures, or geometry on the fly.
Babylon.js provides a straightforward `ComputeShader` class to manage this. You write your computation logic in WGSL (WebGPU Shading Language) and then dispatch it from your JavaScript code.
import { ComputeShader } from "@babylonjs/core/Compute/computeShader";
import { StorageBuffer } from "@babylonjs/core/Buffers/storageBuffer";
import { UniformBuffer } from "@babylonjs/core/Materials/uniformBuffer";

// Assume 'engine' is an initialized WebGPUEngine

// 1. Define the compute shader code in WGSL
const computeShaderCode = `
    @group(0) @binding(0) var<storage, read_write> dataBuffer : array<f32>;
    @group(0) @binding(1) var<uniform> params : f32;

    @compute @workgroup_size(64)
    fn main(@builtin(global_invocation_id) global_id : vec3<u32>) {
        let index = global_id.x;
        // Example computation: square each number in the buffer
        dataBuffer[index] = dataBuffer[index] * dataBuffer[index] * params;
    }
`;

// 2. Create buffers to hold data
const initialData = new Float32Array([1, 2, 3, 4, 5, /* ... up to 1024 ... */]);
const dataSBO = new StorageBuffer(engine, initialData.byteLength);
dataSBO.update(initialData);

const paramsUBO = new UniformBuffer(engine);
paramsUBO.addUniform("params", 1);
paramsUBO.updateFloat("params", 1.5); // Update a uniform parameter

// 3. Create and dispatch the compute shader
const cs = new ComputeShader("myComputeShader", engine, {
    computeSource: computeShaderCode
}, {
    bindingsMapping: {
        "dataBuffer": { group: 0, binding: 0 },
        "params": { group: 0, binding: 1 }
    }
});

cs.setStorageBuffer("dataBuffer", dataSBO);
cs.setUniformBuffer("params", paramsUBO);

// Dispatch the shader to run on 1024 / 64 = 16 workgroups
cs.dispatch(16, 1, 1).then(() => {
    // 4. Read the results back to the CPU
    dataSBO.read().then((res) => {
        console.log("Computation finished. Result:", res);
    });
});
This capability is transformative. Tasks that would previously bog down the main thread, causing stutters and low frame rates, can now be executed asynchronously on the GPU, leading to buttery-smooth applications. This is a topic of great interest in communities beyond just graphics, with Node.js News and Deno News often discussing high-performance computing, a domain WebGPU now brings to the client-side.
Best Practices and Performance Optimization
To make the most of WebGPU in Babylon.js, it’s important to follow some best practices that align with its modern, asynchronous architecture.
Tips for High-Performance WebGPU Scenes
- Always Initialize Asynchronously: As shown in the examples, always use `Engine.CreateAsync` or `new WebGPUEngine(canvas).initAsync()` to create your engine. This prevents blocking the main thread during setup.
- Profile Your Scenes: Use tools like Spector.js to inspect your graphics calls. This will help you identify bottlenecks, whether you’re using WebGPU or WebGL, and understand how Babylon.js is communicating with the GPU.
- Embrace Compute Shaders: Actively look for opportunities to offload work from the CPU. If you have a loop in your JavaScript that’s iterating over thousands of items to update their positions every frame, that’s a prime candidate for a compute shader.
- Manage Resources Wisely: While Babylon.js handles most memory management, in very large-scale applications, be mindful of the lifecycle of your GPU resources (buffers, textures). Explicitly dispose of what you no longer need using the `.dispose()` method to free up VRAM.
- Stay Updated with Tooling News: The ecosystem around web development is always improving. Keep an eye on Vite News, Webpack News, and TypeScript News for updates that can improve your build process and development workflow for complex 3D applications.
Conclusion: A New Era for 3D on the Web
The integration of full WebGPU support into Babylon.js is a watershed moment for web developers. It closes the performance gap between web and native applications, providing the power and flexibility needed to build the next generation of immersive, interactive 3D experiences. By abstracting away the low-level complexities, Babylon.js has made this cutting-edge technology accessible to its entire community.
The key takeaways are clear: WebGPU offers unparalleled performance, unlocks powerful GPGPU capabilities through compute shaders, and provides a more robust foundation for complex applications. With Babylon.js, you can harness this power today, using a familiar and productive API, complete with a sensible fallback strategy for ensuring universal reach. The future of 3D on the web is here, and it’s faster, more powerful, and more accessible than ever before. It’s time to start building.

