
The digital landscape is perpetually haunted by the specter of data breaches, often stemming from the inherent weaknesses of traditional password-based authentication. Weak, reused, and phished passwords are a leading cause of security incidents. In response, the industry is rapidly moving towards a more secure, user-friendly future: a passwordless future. At the forefront of this revolution are Passkeys, a technology built upon the W3C’s Web Authentication (WebAuthn) standard. Passkeys replace passwords with cryptographic key pairs, offering robust protection against phishing and simplifying the login experience for users.
For developers building on the Node.js runtime, particularly with the ubiquitous Express.js framework, integrating this next-generation authentication is now more accessible than ever. This article provides a comprehensive, in-depth guide to implementing Passkey authentication in your Express.js application. We will explore the core concepts of WebAuthn, walk through the practical implementation of registration and authentication flows with detailed code examples, and discuss advanced techniques and best practices to ensure your application is both secure and seamless for your users. Keeping up with the latest in Express.js News means embracing these powerful, modern standards.
The Core Concepts of WebAuthn and Passkeys
Before diving into code, it’s essential to understand the fundamental principles behind Passkey authentication. This technology isn’t just a minor update; it’s a paradigm shift in how we verify user identity online, leveraging public key cryptography to create a phishing-resistant and user-friendly system.
What are Passkeys?
A Passkey is a digital credential that replaces a traditional password. Unlike a password, which is a shared secret that a user must remember and type, a Passkey is based on a unique cryptographic key pair. This pair consists of:
- A Private Key: Stored securely on the user’s device (like a phone, laptop, or hardware security key). This key never leaves the device.
- A Public Key: Sent to and stored by your server (the “Relying Party”) during registration.
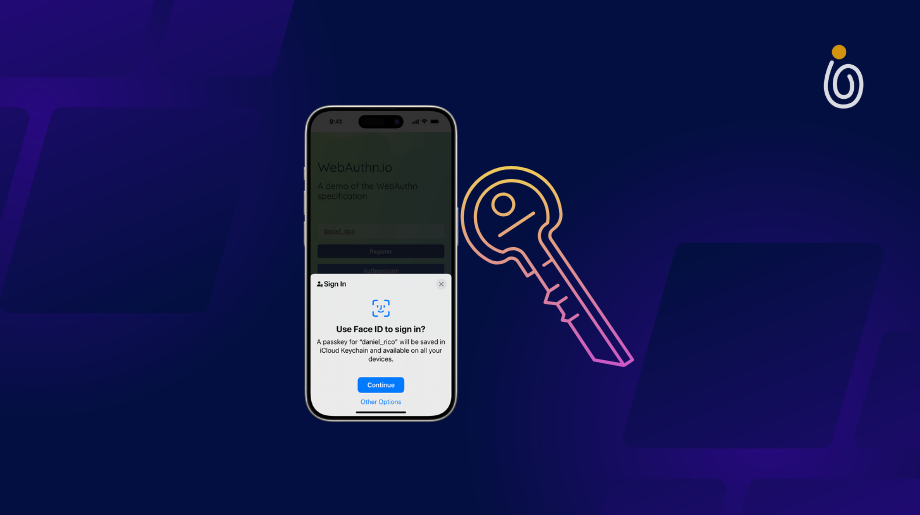
When a user logs in, the server sends a unique challenge. The user’s device uses its private key to “sign” this challenge, and the server verifies the signature with the corresponding public key. This process proves the user possesses the device without ever transmitting a secret over the network. Furthermore, Passkeys are often “discoverable credentials,” meaning they can be synced across a user’s devices via services like iCloud Keychain or Google Password Manager, providing a seamless login experience everywhere.
How WebAuthn Works: A High-Level Overview
WebAuthn is the browser API that makes Passkey authentication possible. It standardizes the interaction between the three main actors:
- The Relying Party (RP): Your web application’s backend, in our case, the Express.js server.
- The Client: The user’s web browser, which implements the WebAuthn API.
- The Authenticator: The hardware or software responsible for creating and storing the key pair and signing challenges. This can be a platform authenticator (built into the device, like Windows Hello or Apple’s Touch ID/Face ID) or a roaming authenticator (a USB key like a YubiKey).
The entire process revolves around two main “ceremonies”: Registration and Authentication. This architectural pattern is flexible, allowing your Express backend to serve any modern frontend, whether it’s built with frameworks covered in React News, Vue.js News, or Angular News.
Setting Up the Express.js Environment

To get started, we need a basic Express.js server. We’ll use the excellent @simplewebauthn/server library to handle the complexities of the WebAuthn protocol. For this guide, we’ll use a simple in-memory object to simulate a user database.
// server.js
import express from 'express';
import {
  generateRegistrationOptions,
  verifyRegistrationResponse,
  generateAuthenticationOptions,
  verifyAuthenticationResponse,
} from '@simplewebauthn/server';
import { isoBase64URL } from '@simplewebauthn/server/helpers';

const app = express();
app.use(express.static('./public')); // For a simple frontend
app.use(express.json());

// In-memory "database" for this example
const userStore = {};
const challengeStore = {};

const PORT = 3000;
const rpName = 'SimpleWebAuthn Example';
const rpID = 'localhost'; // This must match the domain of your app
const origin = `http://${rpID}:${PORT}`;

// Routes will be added here...

app.listen(PORT, () => {
  console.log(`Server listening on port ${PORT}`);
  console.log(`Access at ${origin}`);
});
This basic setup provides the foundation for our authentication logic. The choice of Express.js is a popular one in the Node.js News community, but these concepts can be adapted to other frameworks like those featured in Koa News or Fastify News.
Step-by-Step: Implementing Passkey Registration
The first interaction a user has with Passkeys is the registration process. This involves the user creating a new key pair on their device and sending the public key to our server for storage.
Step 1: Generating Registration Options on the Server
When a user wants to register, our server must first generate a set of options, including a unique, random challenge. This challenge is a critical security measure to prevent replay attacks. The client will use these options to call the WebAuthn API.
// Route to generate registration options
app.get('/generate-registration-options', (req, res) => {
  const { username } = req.query;

  if (!username) {
    return res.status(400).json({ error: 'Username is required' });
  }

  // A real app would check if the user already exists
  if (userStore[username]) {
    return res.status(400).json({ error: 'User already exists' });
  }

  const user = {
    id: `user_${Date.now()}`, // Use a real UUID in production
    username,
  };

  userStore[username] = { ...user, authenticators: [] };

  const options = generateRegistrationOptions({
    rpName,
    rpID,
    userID: user.id,
    userName: user.username,
    // Don't prompt users for security keys if they don't have one
    attestationType: 'none',
    // Exclude credentials that have already been registered
    excludeCredentials: userStore[username].authenticators.map(auth => ({
      id: auth.credentialID,
      type: 'public-key',
    })),
    authenticatorSelection: {
      // Prefer platform authenticators (like Touch ID, Face ID)
      residentKey: 'preferred',
      userVerification: 'preferred',
    },
  });

  // Store the challenge to verify it later
  challengeStore[user.id] = options.challenge;

  res.json(options);
});
Step 2: Verifying the Registration Response on the Server
After the user interacts with their device’s authenticator (e.g., using their fingerprint), the browser’s WebAuthn API returns a credential object. The frontend, whether it’s a simple HTML page or a complex application built with Svelte or a framework from the Next.js News sphere, sends this object back to our server for verification.
Our server must now verify this response. This involves checking the challenge, origin, and cryptographic signature to ensure the request is legitimate. If verification is successful, we store the new public key and other metadata associated with the user.
// Route to verify the registration
app.post('/verify-registration', async (req, res) => {
  const { username, cred } = req.body;

  if (!username || !cred) {
    return res.status(400).json({ error: 'Missing username or credential' });
  }

  const user = userStore[username];
  const expectedChallenge = challengeStore[user.id];

  if (!user || !expectedChallenge) {
    return res.status(400).json({ error: 'User not found or challenge expired' });
  }

  let verification;
  try {
    verification = await verifyRegistrationResponse({
      response: cred,
      expectedChallenge,
      expectedOrigin: origin,
      expectedRPID: rpID,
      requireUserVerification: true,
    });
  } catch (error) {
    console.error(error);
    return res.status(400).json({ error: error.message });
  }

  const { verified, registrationInfo } = verification;

  if (verified && registrationInfo) {
    const { credentialPublicKey, credentialID, counter } = registrationInfo;

    const newAuthenticator = {
      credentialID: isoBase64URL.fromBuffer(credentialID),
      credentialPublicKey: isoBase64URL.fromBuffer(credentialPublicKey),
      counter,
      transports: cred.response.transports || [],
    };

    user.authenticators.push(newAuthenticator);
    // In a real app, save the user object to the database here
    console.log('Registration successful for user:', username);
  }

  // Clean up the challenge
  delete challengeStore[user.id];

  res.json({ verified });
});
Authenticating Users with Their Passkeys
Once a user is registered, they can log in using their Passkey. The authentication flow is similar to registration but serves to prove ownership of the private key rather than creating a new one.
Step 1: Generating Authentication Options
When a user attempts to log in, the server generates a new challenge. Unlike registration, we don’t need to provide user details, but we can provide a list of `allowCredentials` to help the browser and authenticator find the correct Passkey for our site.
// Route to generate authentication options
app.get('/generate-authentication-options', (req, res) => {
  // In a real app, you might identify the user by a session or a username input
  // For this example, we'll just generate a generic challenge
  // A better approach is to get username first, find the user, and pass their credential IDs

  const options = generateAuthenticationOptions({
    rpID,
    userVerification: 'preferred',
  });

  // A temporary challenge for any potential user
  // In a real app, associate this challenge with a specific login attempt/session
  challengeStore['authChallenge'] = options.challenge;

  res.json(options);
});
Step 2: Verifying the Authentication Response
The user’s device signs the challenge, and the frontend sends the response back to our server. The server’s final job is to verify this signature. We must retrieve the user’s stored authenticator data (including their public key) and use it to validate the response. A critical part of this step is checking and updating the signature `counter`. This counter increments with each signature and protects against cloned authenticators and replay attacks.
// Route to verify the authentication
app.post('/verify-authentication', async (req, res) => {
  const { cred } = req.body;

  if (!cred) {
    return res.status(400).json({ error: 'Missing credential' });
  }

  // In a real app, you would look up the user by `cred.id`
  // Here we'll have to find the user whose authenticator matches
  let user;
  let authenticator;

  for (const username in userStore) {
    const foundAuth = userStore[username].authenticators.find(
      auth => auth.credentialID === cred.id
    );
    if (foundAuth) {
      user = userStore[username];
      authenticator = foundAuth;
      break;
    }
  }

  if (!user || !authenticator) {
    return res.status(400).json({ error: 'Authenticator not registered' });
  }

  const expectedChallenge = challengeStore['authChallenge']; // Get the challenge

  let verification;
  try {
    verification = await verifyAuthenticationResponse({
      response: cred,
      expectedChallenge,
      expectedOrigin: origin,
      expectedRPID: rpID,
      authenticator: {
        credentialID: isoBase64URL.toBuffer(authenticator.credentialID),
        credentialPublicKey: isoBase64URL.toBuffer(authenticator.credentialPublicKey),
        counter: authenticator.counter,
        transports: authenticator.transports,
      },
      requireUserVerification: true,
    });
  } catch (error) {
    console.error(error);
    return res.status(400).json({ error: error.message });
  }

  const { verified, authenticationInfo } = verification;

  if (verified) {
    // Update the counter in the database
    authenticator.counter = authenticationInfo.newCounter;
    console.log('Authentication successful for user:', user.username);
    // In a real app, create a session for the user
  }

  delete challengeStore['authChallenge'];

  res.json({ verified });
});
Best Practices and Advanced Topics
Implementing the basic flows is just the beginning. To build a robust and secure system, you need to consider several best practices and advanced concepts. This is crucial whether you’re building a backend for a lightweight client using SolidJS News or Alpine.js News, or a full-stack application with a framework like Remix News or Nuxt.js News.
Security Considerations
- Relying Party ID (rpID): Ensure your
rpIDis set correctly to your website’s domain. Mismatches will cause the authentication to fail. Forlocalhost, it’s fine, but forhttps://example.com, therpIDshould beexample.com. - Challenge Management: Challenges must be unique per-request and have a short lifespan. Storing them in the user’s session (e.g., using
express-session) is a secure way to bind a challenge to a specific user’s attempt. - Transport Layer Security (TLS): WebAuthn is only available on secure contexts (HTTPS), except for
localhost. Always use HTTPS in production. - Code Quality: Employ modern development tools. Integrating tools like those covered in ESLint News for linting and Prettier News for formatting is standard practice. Similarly, robust testing with frameworks like Jest News or end-to-end tools from the Cypress News world is essential.
User Verification (uv) vs. User Presence (up)

WebAuthn distinguishes between two levels of user interaction:
- User Presence (up): The authenticator confirms a user is physically present (e.g., by tapping a security key). This is the default.
- User Verification (uv): The authenticator verifies the user’s identity, typically via a biometric scan (fingerprint, face) or a device PIN.
For higher security, you should require user verification by setting requireUserVerification: true in your verification options and userVerification: 'required' in your generation options. The ‘preferred’ setting provides a good balance, using verification if available but not failing if it isn’t.
Fallback Mechanisms and User Experience
Passkey adoption is growing but is not yet universal. It’s crucial to provide fallback authentication methods, such as magic links or even traditional passwords (if necessary), for users on older devices or browsers. Your UI should clearly guide users through the Passkey creation and login process, explaining what is happening and why it is more secure. This attention to detail ensures your application remains accessible to everyone, regardless of their technology stack, which could even include legacy systems still discussed in jQuery News.
Conclusion
Passkeys and the WebAuthn standard represent a monumental leap forward for web security and user experience. By moving away from vulnerable, password-based systems, we can build applications that are fundamentally more resistant to phishing and easier for users to access. As we’ve seen, implementing this technology in an Express.js application is straightforward with the help of robust libraries like @simplewebauthn/server.
This guide has walked you through the core concepts, the step-by-step implementation of registration and authentication flows, and the critical best practices for building a secure system. The future of authentication is passwordless, and by integrating Passkeys today, you are not only enhancing your application’s security but also future-proofing it. The next step is to integrate this logic into your own projects, refine the user experience, and become an advocate for a safer, password-free internet.